What a Lace Front Wig Is, and Why the Install Matters More Than the Wig
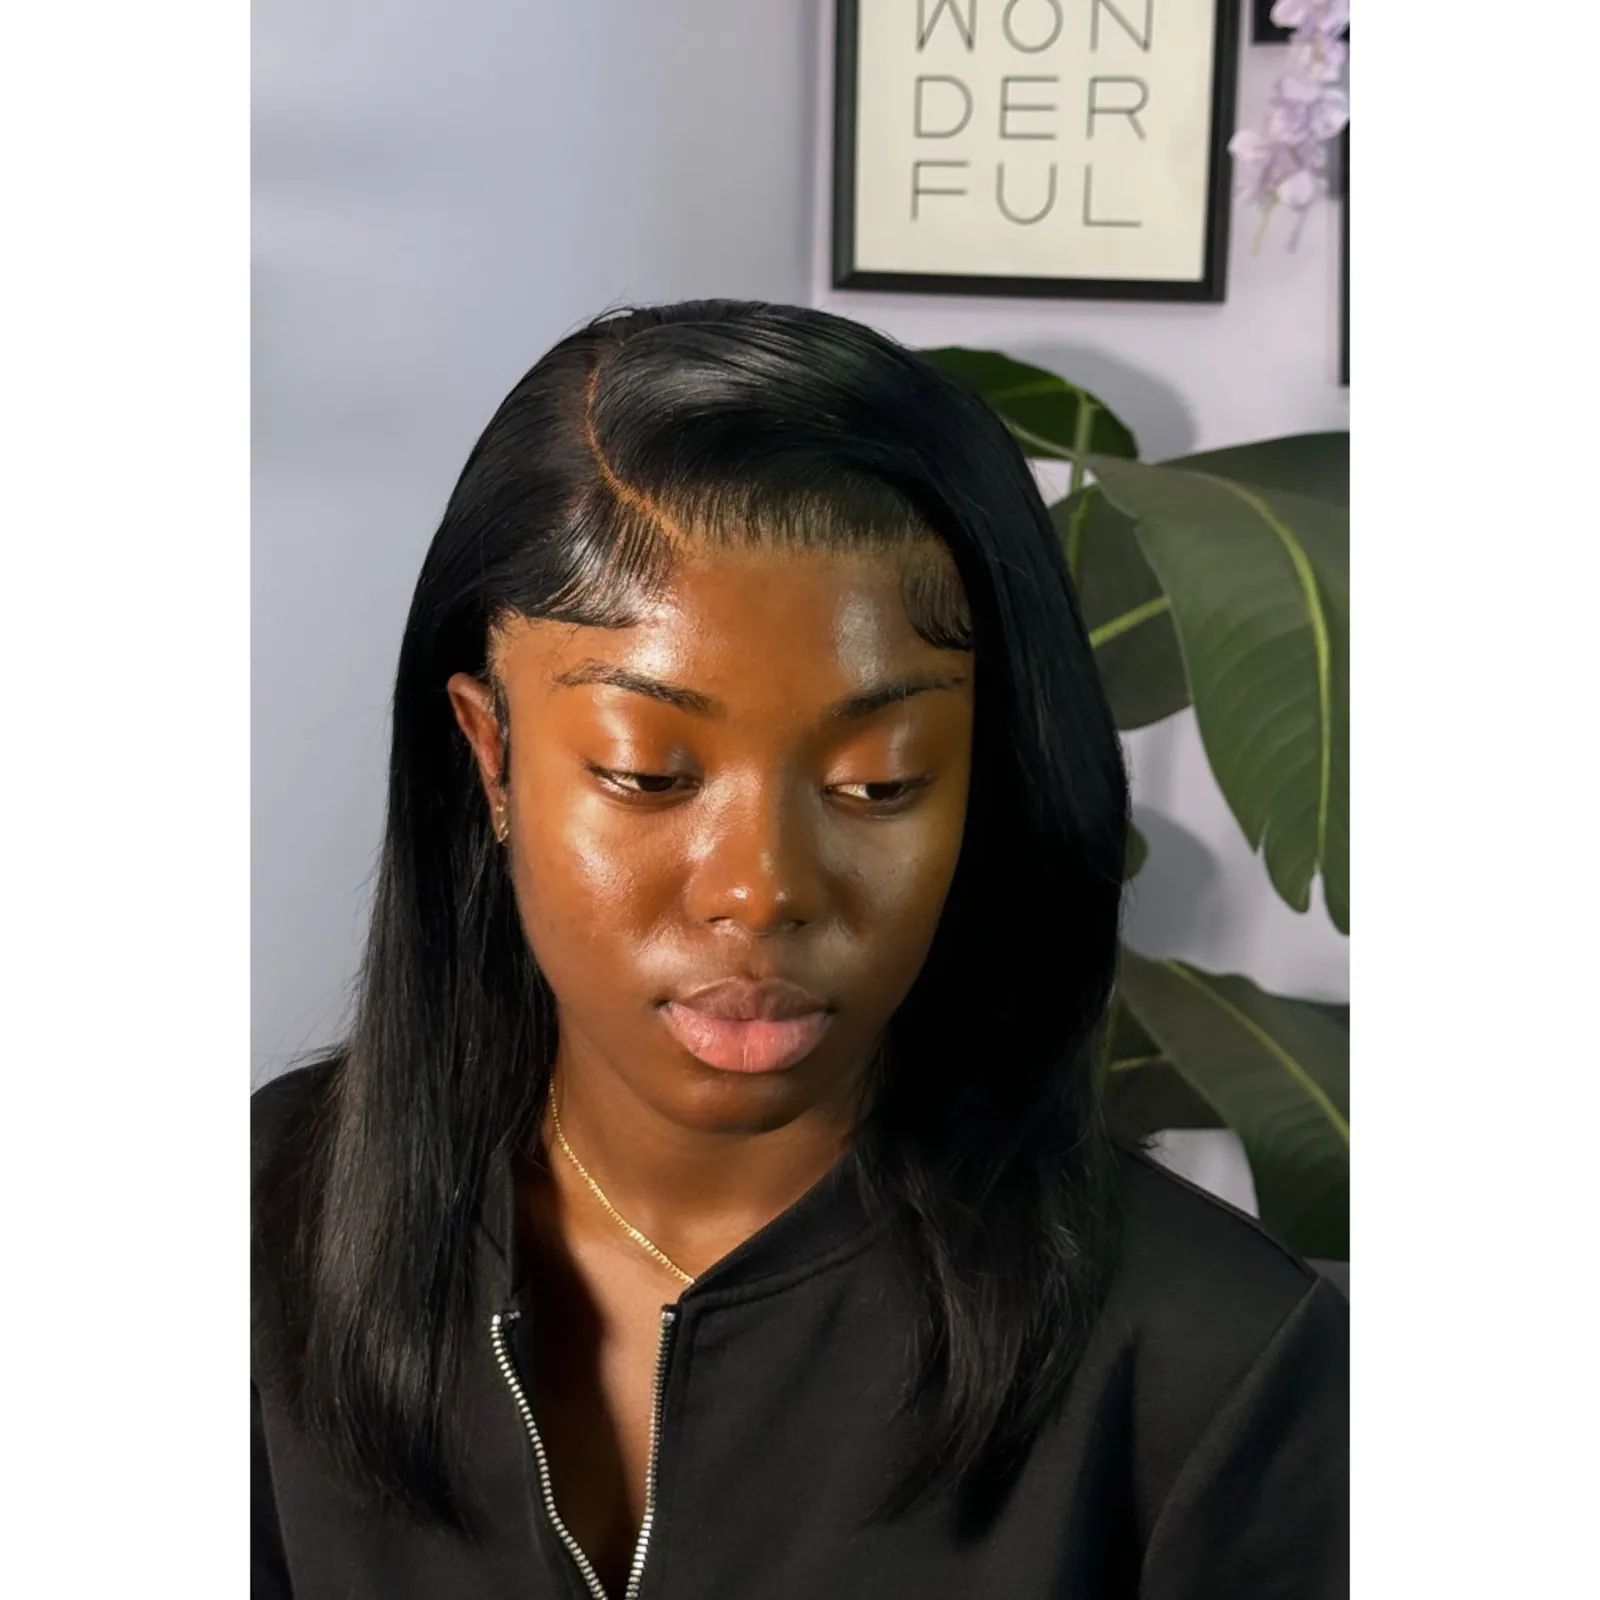
Half the wigs that come through my studio are beautiful units that have never been installed properly, and the owner thinks the wig is the problem. It usually is not. A lace front wig is only as good as the hairline someone builds on it.
A lace front wig is a wig with a sheer lace panel along the front hairline, with each hair tied into the lace by hand, so when the lace is cut and laid against the skin the hair looks like it is growing from your scalp. The rest of the cap is a standard wefted or machine made cap. My lace front install is $140, about two hours, and includes the braid down or blow dry, scalp treatment, knot bleaching, plucking and styling.
What a lace front wig is
The lace front is the strip of lace at the front of the cap, usually about 13 inches wide and 4 to 6 inches deep, where every strand is individually knotted into the lace. Behind that strip, the cap is sewn wefts or a stretch cap.
The lace is what makes the difference. Because it is sheer and the knots are tiny, you can cut it close to the hairline, lay it flat with adhesive or a glueless band, and the hair appears to come straight out of the skin. You can part the hair anywhere inside the lace area and wear it off the face without showing a hard edge.
Sizes are written as width by depth. A 13x4 gives 13 inches across the hairline and 4 inches back for parting. A 13x6 gives 6 inches back, so deeper parts and more styling room. A closure wig uses a smaller square of lace, 4x4, 5x5 or 6x6, in the middle of the front only. My lace frontal install page shows the finished hairline on real clients.
A short history, and how lace wigs reached the salon chair
Lace wigs started on film sets. Hand tying hair into fine lace let costume departments give actors convincing hairlines under studio lights, and for decades that work stayed in theater and film because it was slow and expensive.
Through the 1990s and 2000s, lace front units moved into mainstream beauty as human hair sourcing expanded and factories began producing lace fronts at scale. Celebrities wore them openly, then salons learned the install, then online stores made them a product you could buy without a stylist. What did not change is the skill at the hairline. A factory can tie the hair; a person still has to customize the lace, bleach the knots, pluck the density and lay it to your head.
Today a lace front is the standard protective style for a lot of my Queens clients: a way to wear straight, wavy or curly hair, change color without chemicals, and keep their own hair braided and resting underneath for weeks at a time.
The listings have changed too. Ten years ago a lace front was a lace front; now the title reads HD lace, pre plucked, pre bleached, glueless, 13x6. Those words describe real improvements, and none of them replaces a hairline customized to your face. The wig got better; the install still decides the result.
Why a good lace front looks natural
Three things make a lace front disappear: the lace, the knots and the hairline work. Skip any one of them and the wig reads as a wig.
The lace itself
Standard Swiss lace is sturdy and slightly visible. Transparent lace is thinner and lighter. HD lace is the thinnest, almost invisible on most skin tones once laid, and the most delicate. The closer the lace tone to your scalp, the less work it takes to hide.
Knot bleaching
Every hair tied into the lace leaves a tiny dark knot. From the factory those knots look like black dots along the part and hairline. Bleaching the knots lightens them so the part looks like scalp. This is included in my install, and it is the step most home installs skip.
Plucking and baby hair
Factory hairlines are too dense and too straight. Plucking removes hair along the edge in a gradient so the hairline fades in like real growth, and a few hairs laid as baby hair soften the line. Too much plucking leaves holes; too little leaves a wall of hair.
Laying the lace
The lace has to sit flat on skin with no gap and no ridge, which means a flat braid down or a smooth blow dry underneath and a scalp that has been prepped. Then the lace is cut along the natural shape of your hairline, not in a straight line, and melted into the skin with adhesive or secured glueless.
Tinting and the shape of the cut
Lace that is lighter than your scalp shows as a pale band at the part. A tint, or a touch of foundation pressed onto the lace, closes that gap. The cut matters as much: a real hairline has a slight peak at the center and recedes a little at the temples, so I follow that shape rather than cutting straight across.
Types of lace front wigs
Lace fronts vary by hair, lace and size, and the right combination depends on how you will wear it. These are the choices that matter.

Human hair versus synthetic
Human hair can be heat styled, colored, washed and reinstalled many times, and it moves like your own. It costs more and needs more care. Synthetic lace fronts are affordable and hold their style out of the box, but most cannot take heat or color and they last a fraction of the time. For an install you plan to wear for weeks and reinstall, human hair is the better buy.
Lace type
Swiss, transparent and HD, from most durable to most invisible. HD lace gives the best melt and tears most easily, so it is best installed by someone careful.
Lace size
13x4 for a standard part and most styles. 13x6 for deep side parts, slicked styles and more room to change the part. 360 lace adds lace around the whole perimeter for high ponytails.
Pre plucked and pre bleached
Many units now come pre plucked and with bleached knots. It is a head start, not a finished hairline; I still customize it to your face.
Glueless construction
Glueless lace fronts have an elastic band, combs and an adjustable cap so they hold without adhesive. My glueless wig install is $150 and uses no glue or tape at all.
Lace front wigs versus other wig types
The lace front is the middle of the range: more realistic than a basic cap, less lace than a full lace unit. Here is how it compares.
| Type | Where the lace is | Parting | Best for |
|---|---|---|---|
| Basic cap, no lace | None | Fixed part or bangs | Budget, occasional wear, bangs that cover the hairline |
| Closure wig, 4x4 to 6x6 | A square at the front center | Within the square | Middle parts, everyday wear, easier install |
| Lace front, 13x4 or 13x6 | Across the whole front hairline | Anywhere in the front 4 to 6 inches | Off the face styles, side parts, the most natural hairline |
| 360 lace | Around the full perimeter | Front, plus up styles | High ponytails and updos |
| Full lace | The entire cap | Anywhere | Any style including braids, highest price |
A closure wig is the right choice for a lot of people, especially for a first unit and for everyday wear. My closure wig install is $130 for 4x4, 5x5 or 6x6 units. The lace front wins when you want to wear the hair off your face or part it anywhere.
Pros and cons of lace front wigs
A lace front is the most natural looking option for the money, with real trade offs in care and install skill. Be honest with yourself about both.
Pros
- The most realistic hairline short of full lace
- Part it anywhere inside the lace and wear it off the face
- Protects your own hair, which rests braided underneath
- Change length, texture and color without chemicals on your hair
- Human hair units can be reinstalled many times
- Breathable at the front, where a solid cap would sweat
Cons
- The hairline needs customization; out of the box it looks like a wig
- Lace, especially HD, tears if handled roughly
- Adhesive installs need removal care, and some skin reacts to glue
- Good human hair units are an investment
- Maintenance is weekly, not monthly: edges, lace, scalp
- Heat, sweat and oil loosen the lace over time, so installs are temporary
If the cons read as a lot of work, a closure wig or a glueless unit is the easier version of the same idea. If the pros are what you want, the maintenance is a habit you build in the first month and it stops feeling like work.
How to choose the right lace front wig
Choose by how you will wear it, then by your hair, then by your budget. Most bad purchases happen in the other order.
- Style first. Middle part every day: a closure might do. Side part, slicked back or off the face: 13x4. Deep part or frequent part changes: 13x6. High ponytails: 360 or full lace.
- Match the lace to your skin. Transparent or HD lace in a tone near your scalp needs the least tinting. If you are between tones, lighter lace is easier to tint darker than the reverse.
- Pick density for your face and texture. 130 to 150 percent reads natural for straight hair; 180 and up gives fullness for curly and wavy textures and for long lengths. Very high density at the hairline looks heavy.
- Match the texture to your own hair. If you want your edges to blend, kinky straight or yaki textures blend with 4C hair far better than silky straight.
- Measure your head. Most units come in medium; small and large caps exist and the fit decides comfort and security, especially for glueless.
- Human hair if you will reinstall. If you plan to wear it for weeks and reinstall it, a human hair unit pays for itself.
- Buy before you book. Drop the wig off two to three days before your install so I can customize the lace and knots before you sit down.
On budget: spend on the hair first, since that is what you will wash, style and reinstall; then the lace; then density. A mid range human hair unit with transparent lace, installed well, beats an expensive HD unit installed badly every time.
How the install goes at my studio, plus styling and care
The install is where the wig becomes a hairline. Here is what my $140 lace front install includes, and how to keep it looking that way at home.
The install
- Drop the wig off two to three days before. I bleach the knots, pluck the hairline and tint the lace if needed.
- Braid down or blow dry your own hair flat, then a scalp treatment so the skin under the lace is clean and calm.
- Protect the hairline, lay the lace with adhesive or secure it glueless, and cut it along your natural hairline.
- Melt the lace, lay baby hair if you want them, and style: straight, waves, curls or a sleek look.
Plan about two hours. The deposit is $40. A reinstall of a unit you own is $140 and about 90 minutes, and a same day install, when available, is $350. All of my hair services are on the Queens hair services page.
Styling at home
Human hair takes heat; keep it on a low to medium setting and use a heat protectant. Sleep in a satin bonnet or on a satin pillowcase. Tie the edges down with a scarf for twenty minutes in the morning to keep the lace flat. Do not pull the hair into tight styles that tug on the lace.
Care between installs
Wash the unit gently with sulfate free shampoo, condition from mid length to ends, and air dry on a wig stand. Clean adhesive off the lace with a lace release rather than scrubbing. Rest your own hair between installs, moisturize your edges and give your scalp a wash and a break. When the lace lifts or your braid down grows out, usually after a few weeks, book the reinstall rather than regluing at home.
Signs it is time to come in: lace lifting at the temples, a part that no longer lies flat, itching under the braid down, or hair that has grown enough to make the cap sit higher. Those are reinstall signs, not reasons to add more glue.
Bring your unit to Springfield Gardens
Bring your unit to Tyca Beaute on 232nd Street in Springfield Gardens, Queens, two to three days ahead, and I will build the hairline the wig deserves. Details and the booking link are on the lace frontal install page; the install is $140 with a $40 deposit.
Questions readers ask
Can a lace front wig be worn without glue?
Yes. A glueless unit holds with an elastic band, combs and an adjustable cap, and my glueless install uses no glue or tape at all.
Is HD lace worth it for a first wig?
HD lace gives the most invisible hairline, but it tears easily. For a first unit, transparent lace is a forgiving middle ground; HD is worth it once you are comfortable with care.
How long does a lace front install last?
It depends on your scalp, sweat and care, usually a few weeks before the lace lifts or the braid down grows out. A reinstall is $140 and about 90 minutes.
Will a lace front damage my edges?
Not when it is installed and removed properly. The risk comes from adhesive on unprotected skin and from pulling lace off dry; I protect the hairline at install and recommend a lace release for removal.