How to Install a Wig: What You Learn in the Beginner Class

Most people who ask me how to install a wig have already watched twenty videos and tried twice. The lace looked thick, the glue went white, the hairline sat half an inch too low. The steps are not secret. The order, the timing and the pressure are what the videos skip, and those are what I teach.
A lace wig install has three stages: prep your own hair and skin so the cap sits flat, customize the lace so the hairline looks like skin, then lay the wig, secure it with adhesive or with a fitted cap, cut the lace and blend. Done well it takes about 2 hours. In my beginner wig install class you do every one of those steps with your own hands over two days, which is the part a screen cannot give you.
The twelve steps of a lace wig install
Here is the whole process in order. Every step below has its own section further down, but seeing them in one list shows you where home installs usually go wrong: steps 2 and 3 are done the night before, not on install day, and step 9 is where people lose patience.
- Braid or slick your own hair flat and put on a wig cap.
- Bleach the knots on the lace so the part does not show dark dots.
- Pluck the hairline so the density fades in like real hair.
- Clean the skin along your hairline with alcohol or witch hazel so it is free of oil.
- Tint the lace or the cap edge to match your skin if needed.
- Try the wig on dry, line the front of the lace up with your natural hairline and check the fit.
- Apply adhesive in thin layers along the hairline, letting each layer turn clear and tacky.
- Lay the lace into the adhesive from the center outward, pressing in sections.
- Let the adhesive set. Rushing this step is why installs lift the same day.
- Cut the excess lace close to the hairline in small, uneven snips so the edge does not read as a straight line.
- Blend the hairline with a little foundation or powder on the lace, and lay baby hairs if you wear them.
- Style the unit.
If you are going glueless, steps 7 to 9 are replaced by fitting the cap, band and combs, and the rest stays the same. More on that below.
Tools you need before you start
You can do a clean install with a short kit. The expensive part is the wig, not the tools, and the tools you reuse for years.
- A wig cap in a shade close to your scalp, and a stocking cap or mesh cap if you prefer.
- Rat tail comb and edge brush for the braid down and the baby hairs.
- Bleach powder, a 30 volume developer, a mixing bowl and a brush for the knots.
- Tweezers for plucking, and a canvas head with pins to hold the wig while you work.
- Rubbing alcohol or witch hazel to clean the skin, and a scalp protector if your skin reacts to adhesive.
- A lace adhesive you trust, or a strong holding gel for a short wear, and a small applicator brush.
- Sharp scissors, ideally small ones with a curved blade, for cutting the lace.
- A silk or satin scarf to set the lace while the adhesive cures.
- Foundation or a lace tint spray, powder, and a flat iron or curling wand for styling.
In the class you work with the full set in front of you, which is the quickest way to find out which tools you actually like before you buy them.
Prep your hair and scalp
The install is only as flat as what is under it. Spend the time here and the rest of the install gets easier.
Braid down or slick down
Cornrow your hair straight back, or in a pattern that follows the direction of the wig's part, keeping the braids small and flat and the ends tucked. If your hair is too short to braid, slick it flat with gel and wrap it until it dries. For a middle part unit, braid away from the part on both sides so there is no ridge under the lace. If you prefer not to braid at home, a blow dry that gets the hair flat and tied down works for a short wear.
Wig cap
Pull a wig cap on over the braids and set its front edge just behind your natural hairline, not on top of it. If you glue, the cap edge gets a thin line of adhesive too, so the lace has something to grip. Some people cut the cap back a half inch so no cap sits under the lace at all; both ways work, and the class covers when to use each.
Skin prep
Wipe your hairline with alcohol or witch hazel to lift oil and any leftover product. Let it dry fully. If you are sensitive, apply a scalp protector and let that dry too. Adhesive on oily skin is the single most common reason a home install lifts before the day is over.
Customize the wig before install day
A wig straight from the box has dark knots at the part, a hairline that is a solid wall of hair, and lace that may be too light or too dark for you. Customizing fixes all three, and it should be done the day before so the lace is dry and you are not rushing.
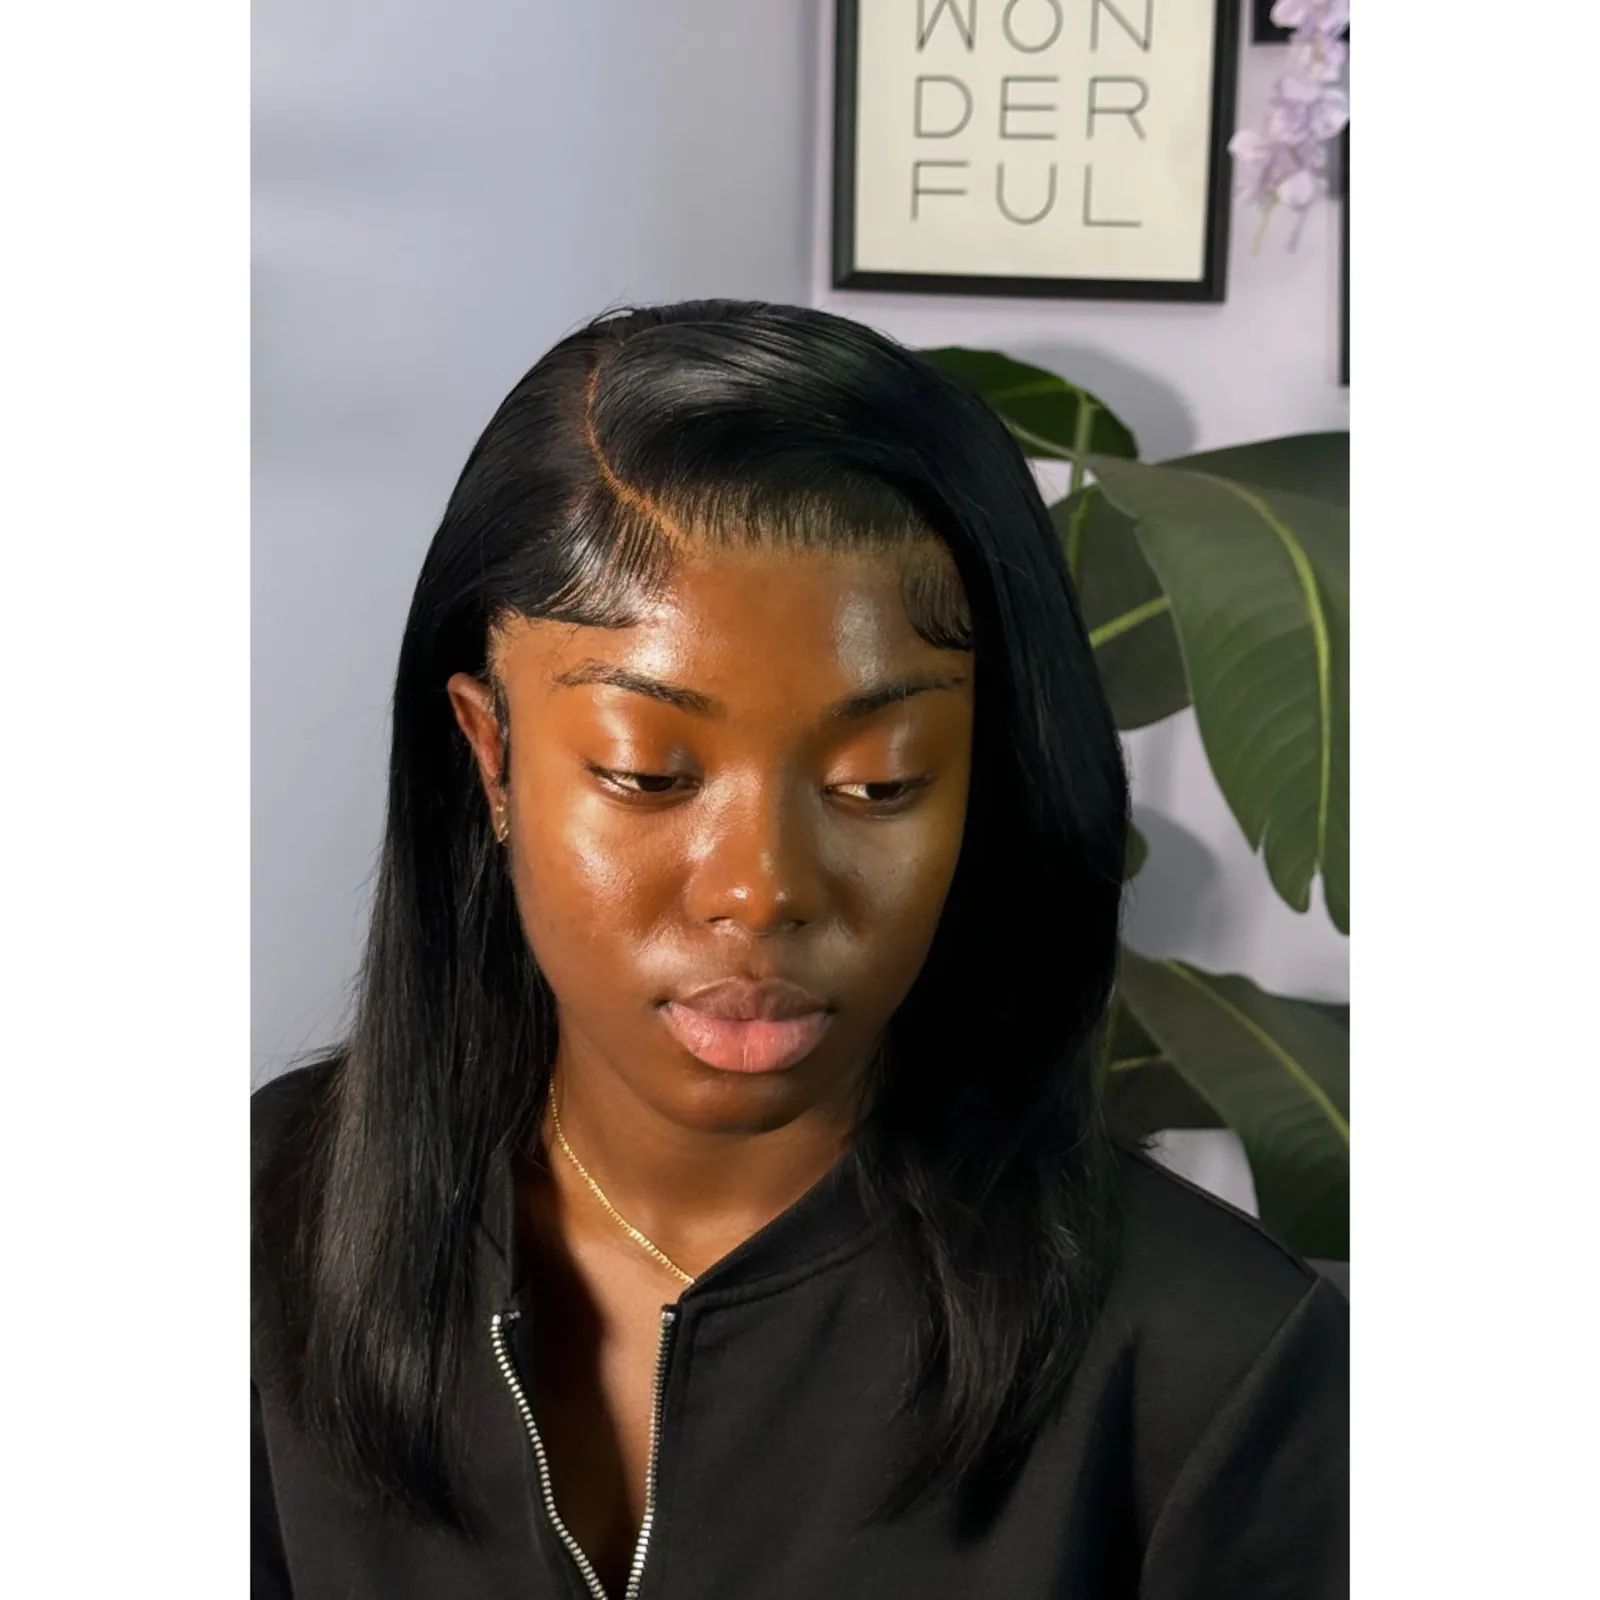
Bleach the knots
Turn the wig inside out on the canvas head, mix bleach to a thick paste so it does not seep through to the hair, and paint it over the knots along the part and the front inch of the hairline. Watch it closely; you are lightening the knots, not the hair. Rinse with cool water and a purple shampoo to kill the warmth, and let it dry.
Pluck the hairline
Pluck in rows, working back from the front edge, taking a few hairs at a time. The goal is a gradient, sparse at the very edge and fuller an inch back, with the part plucked a touch wider than you think. Over plucking is permanent, so stop and check against your face often.
Tint the lace
If the lace is lighter than your skin, tint it with a lace spray, a powder foundation or a diluted liquid foundation applied to the underside. Let it dry before you install.
This is the stage I do for you when you book an install, which is why I ask clients to drop the wig off 2 to 3 days ahead; the knot bleaching, plucking and styling are part of a lace frontal install. In the class, you do it yourself on day one.
Lay the wig, secure it, cut and blend
Install day is placement and patience. Get the hairline in the right place, give the adhesive time, cut the lace in small bites.
Placement
Put the wig on dry first. The front of the lace should sit where your own hairline starts, which on most people is about four finger widths above the eyebrows. Too low looks like a wig; too high shows cap. Check the ear tabs sit in front of your ears and the back is at the nape, then take note of where the lace lands.
Adhesive
Brush a thin layer of adhesive along the hairline, just beyond where the lace will end, and wait until it goes clear and tacky. Add two or three more thin layers the same way. Thick, wet glue slides. Put the wig on, line the front up with the mark you noted, and press the lace into the adhesive from the center of the hairline out to the temples with the back of a comb. Tie a satin scarf over the hairline for ten to fifteen minutes so it sets flat.
Cut the lace
Pull the hair back out of the way, hold the lace taut, and cut along the hairline in small, slightly jagged snips. A straight cut reads as a line. Leave the ear tabs for last and cut them following the curve of your sideburns. Any glue showing at the edge can be rolled off with a cotton swab once it is dry.
Blend and style
Press a little powder or foundation into the lace to kill the shine, lay baby hairs with a small brush and gel on your own hair, and style the unit the way you want to wear it. A fresh install looks best when the hair falls forward over the temples for the first day while everything settles.
How to install a wig without glue
A glueless install skips the adhesive and relies on fit. The braid down, the customizing and the cutting are the same; what changes is how the wig is held.
Measure your head and make sure the cap matches the measurement, with a half inch of slack at most. Set the elastic band inside the cap so it pulls the front lace back snugly across the crown. Put the wig on, clip the combs into your braids, and tighten the adjustable straps at the nape until the cap sits without shifting when you tilt your head forward. Lay the edges with gel on your own hair, not on the lace, and cut and blend as usual.
You give up the melted hairline that glue gives, and you gain nightly removal and no adhesive on your skin. If that trade appeals to you but you do not want to fit the cap yourself, my glueless wig install is a custom fit with no glue or tape, and you leave able to take it off and put it back on at home.
What the beginner class gives you that a video cannot
The class is hands on and private. You work with your own hands, on a real head, with me correcting your pressure, your angles and your timing as you go, which is the feedback no tutorial can give. Most students arrive able to describe an install and leave able to do one.
| Beginner wig install class | Detail |
|---|---|
| Price | $600 |
| Format | Two day, six hour class, hands on and private |
| Deposit to reserve a seat | $100 |
| Seats | Limited |
| Where | Tyca Beaute studio, Springfield Gardens, Queens |
Over the two days you work through the install the way this post lays it out, from braid down to styling, with your hands on the tools instead of on a remote. You get to make the beginner mistakes, over plucking a section, cutting a straight line, laying glue too thick, where they cost nothing and can be corrected on the spot.
The people who get the most from it are new wearers who want to stop paying for every reinstall, braiders and stylists adding wig installs to their menu, and anyone who has tried at home twice and wants to know what went wrong. Seats are limited, so the $100 deposit is what holds yours. The beginner wig install class page has the details, and my makeup and wig install classes page lists the beginner makeup class alongside it.
Learn to install a wig in Springfield Gardens
Read this post, try it once, and then come learn it properly. The steps are the same ones you just read; the difference is doing them with someone correcting your hands.
Tyca Beaute is at 146-20 232nd St in Springfield Gardens, Queens, by appointment only. Reserve your seat in the beginner wig install class at the booking page with the $100 deposit, or call (973) 963-7449 with questions. The studio is open Wednesday through Sunday, and the Q111 stops about three minutes away at 147th Avenue and 230th Place.
Questions readers ask
Where should the front of the wig sit?
At your natural hairline, which on most people is about four finger widths above the eyebrows. Try the wig on dry first and mark where the lace lands before you apply any adhesive.
Do I need a wig cap under a lace wig?
Usually yes. It smooths the braids, protects your hair from the cap and gives the adhesive a clean edge to grip. Set its front edge just behind your hairline so no cap shows under the lace.
Can I sleep in a wig I glued myself?
Yes, if the adhesive set fully before bed and you sleep in a satin bonnet with the edges covered. If the lace lifts the first night, the glue was laid too thick or on oily skin, not set long enough, or both.
How long can I wear a lace front wig after a home install?
A glued home install usually holds one to two weeks, longer as your layering and prep improve. Take it down once the lace lifts or the scalp itches, and never pull dried glue off without a remover.